This post has already been read 434 times!
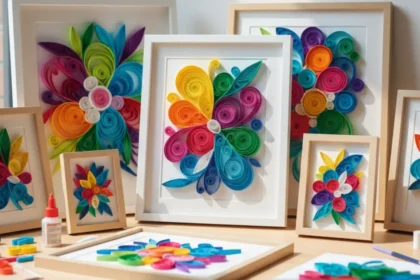
Paper quilling is an ancient art form that has evolved over the centuries into a beautiful and intricate craft. It involves rolling and shaping strips of paper to create stunning designs, patterns, and 3D objects. Whether you’re looking for a new creative hobby or a way to add a personal touch to your crafts, paper quilling is a fantastic choice. In this beginner’s guide, we’ll explore the art of paper quilling, step by step.
Getting Started with Paper Quilling
Before you dive into the world of paper quilling, you’ll need to gather some essential supplies. Here’s what you’ll need:
Quilling Paper Strips: These are the foundation of your projects. They come in various colors and sizes.
Quilling Tool: This specialized tool helps you roll and shape the paper strips.
Glue: A good quality adhesive is crucial to hold your quilled pieces together.
Quilling Board: This board has different-sized circles to help you create consistent shapes.
Basic Shapes Template: It’s useful for beginners to practice and create fundamental shapes.
Once you have these supplies in hand, you’re ready to embark on your journey.
Basic Paper Quilling Techniques
1. Rolling and Coiling:
- Take a paper strip and place one end into the quilling tool.
- Roll the paper tightly around the tool until you reach the other end.
- Gently slide the rolled paper off the tool, and it will hold its shape.
2. Making Tight Coils:
- Roll the paper strip as before.
- Apply a dab of glue to the end of the strip before you finish rolling.
- This will create a tight coil that won’t unravel.
3. Creating Loose Coils:
- Roll the paper strip as usual but don’t apply glue at the end.
- When you release the rolled paper, it will loosen up, creating a loose coil.
4. Shaping with Fingers:
- You can shape your coils into various designs by pinching, bending, or stretching them.
5. Combining Shapes:
- Once you’ve mastered the basic shapes, you can combine them to create intricate designs.
Basic Quilling Shapes
Let’s start with some fundamental shapes you can create:
1. Teardrop: Create a teardrop shape by pinching one end of a coil.
2. Square: Make a square shape by pinching all four sides of a loose coil.
3. Triangle: Pinch three sides of a loose coil to form a triangle.
4. Rectangle: Gently press a loose coil to create a rectangle.
5. Circle: Leave a coil as it is to make a circle.
Simple Projects
Now that you’ve got the hang of basic quilling techniques and shapes, let’s try a simple project to get you started:
Paper Quilled Greeting Card:
Materials Needed:
- Quilling paper strips in various colors
- Greeting card or cardstock paper
- Glue
- Quilling tool
- Quilling board
Steps:
- Create quilled shapes of your choice. You can make flowers, leaves, or any other design you prefer.
- Arrange and glue the quilled shapes onto the greeting card to create a beautiful pattern.
- Let it dry, and your custom quilled greeting card is ready to impress!
Advanced Paper Quilling Techniques
As you gain confidence in your quilling skills, you can explore more advanced techniques:
1. Multi-Strip Rolling: Use multiple paper strips to create larger and more complex quilled pieces.
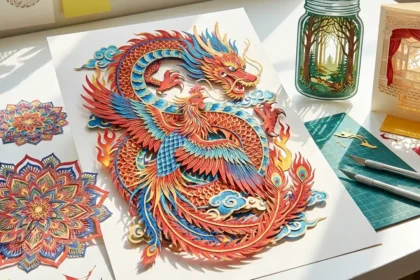
2. 3D Quilling: Make intricate 3D objects by combining various shapes and coils.
3. Layering: Layer different quilled elements to create depth and dimension in your designs.
4. Fringing: Cut the edges of your quilled strips to create a fringe effect for added texture.
Tips for Successful Paper Quilling
- Be patient. Paper quilling can be time-consuming, but the results are worth it.
- Experiment with different color combinations to make your designs stand out.
- Keep your workspace organized and tidy to avoid losing or damaging your quilled pieces.
- Don’t be afraid to make mistakes; they often lead to unexpected and beautiful results.
- Join online quilling communities or take a class to learn from experienced quillers and get inspiration.
The Joy of Paper Quilling
Paper quilling is not just a craft; it’s a form of art that allows you to express your creativity and create unique pieces. Whether you want to make intricate jewelry, decorate cards, or design home décor, it offers endless possibilities.
With practice, you’ll develop your quilling style and discover new techniques to enhance your creations. The key is to enjoy the process and let your imagination run wild.
Your Paper Quilling Journey Begins
Now that you’ve been introduced to the fascinating world of paper quilling, it’s time to pick up your supplies, start practicing, and let your creativity flow. You’ll be amazed at the stunning pieces you can create with a few strips of paper and a bit of patience.
Remember, the more you quill, the more skilled you’ll become. So, don’t be afraid to make that first coil and start your quilling journey today.
Whether you’re a beginner or an experienced quiller, the art of paper quilling offers a world of possibilities for creativity. We’d love to hear about your experiences. Share your thoughts, questions, or even some of your quilling projects in the comments below. Let’s build a vibrant quilling community together!