This post has already been read 1 times!
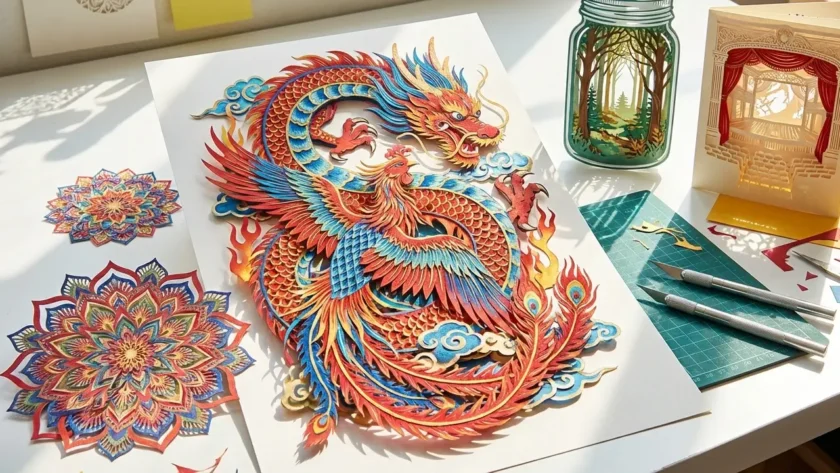
Papercutting isn’t just about simple snowflakes or card edges. True enthusiasts know the thrill of attempting advanced papercutting projects that demand precision, patience, and creativity. If you’ve mastered the basics, it’s time to push your skills to the next level.
Whether you’re crafting to display your art or preparing for competitions, these projects will challenge your hands and focus your mind.
Why Go Beyond the Basics?
Mastering advanced papercutting gives you a deeper appreciation for this art. It’s more than decoration — it becomes storytelling with paper. Many seasoned artists say that intricate paper art helps them improve concentration and creativity.
As your skills improve, you’ll find yourself creating gallery-worthy pieces, selling your work, or even designing custom commissions.
Project 1: Multi-Layered Landscape Scenes
Imagine slicing layer after layer to create a 3D mountain range or forest scene. This project involves cutting several sheets and layering them to build depth.
You can start with 4–5 layers. Use spacers between each sheet to separate them slightly. This gives the illusion of depth when light hits the final framed piece.
Artist Emma C. once shared how she created a stunning Grand Canyon scene with 11 layers of paper. Each took over two hours to cut. But the result? A breathtaking shadow-box masterpiece that sold for $500.
Project 2: Mandala-Inspired Wall Art
Mandala papercutting is a real test of symmetry and focus. One mistake, and the balance is gone.
To begin, print your design on paper. Use a sharp craft knife with a rotating blade to handle the tiny curves and details. A light pad underneath can help guide your cuts.
Choose contrasting paper colors to back your mandala. This makes the design pop. Perfect for framing or gifting.
Project 3: Pop-Up Architecture Cards
These are not your average greeting cards. They fold flat but open to reveal buildings, bridges, or temples. Think pop-up versions of famous landmarks like the Eiffel Tower or Sydney Opera House.
This advanced papercutting technique combines engineering with artistry. You’ll need to measure folds and plan for how the paper rises.
Yuki, a designer in Tokyo, created a pop-up castle with over 70 separate cuts. It took her three days and precise folding techniques learned from Japanese kirigami traditions.
Project 4: Lace Pattern Lanterns
Lace-inspired designs can transform a simple lantern into a glowing piece of art. Use tracing paper or vellum for this. Cut lace-like floral or geometric patterns and wrap them around LED candles.
This project is a favorite at winter craft fairs. It gives you a chance to sell your creations or gift them during holidays.
Craft tip: Always use a cutting mat and rotate the paper, not your hand. It reduces wrist strain during detailed cuts.
Project 5: Story Panels
Turn your favorite fairy tale or myth into a papercut series. Each panel can show a part of the story — a dragon in the forest, a hero climbing a cliff, or a ship on stormy seas.
Use silhouette styles with backlighting. You can build a shadow box with small LED strips to bring the scenes to life.
For example, an artist named Luis from Spain recreated the “Little Mermaid” in five shadow panels. The piece was later displayed in a children’s library in Madrid.
Project 6: Full-Portrait Papercuts
One of the hardest forms of advanced papercutting is creating human portraits. Unlike cartoons, these require capturing shadows, expressions, and hair with delicate slits and shapes.
Use a high-resolution photo, then convert it to black-and-white with sharp contrasts. This helps guide where to cut and what to leave.
Patience is key. Artists often spend 15+ hours on a single portrait, especially when cutting facial details like eyelashes or strands of hair.
Essential Tools for Advanced Papercutting
You need more than scissors here. Stock up on:
- Precision craft knives (like X-Acto)
- Self-healing cutting mat
- Lightbox for tracing
- Fine-tip tweezers
- Metal ruler and stencil sets
- Various paper weights (100–250 gsm works best)
Keep extra blades handy. A dull blade tears the paper and ruins details.
Tips to Stay Sharp
Advanced papercutting requires physical and mental focus. These tips help:
- Take breaks every 30 minutes
- Stretch your fingers and neck often
- Keep your workspace well-lit
- Store your paper flat to avoid bends
Also, never rush the finish. The beauty of your art lies in the precision.
Finding Inspiration
Join online communities like Cut Paper Collective or Reddit’s papercutting forum. Follow artists on Instagram using hashtags like #advancedpapercutting or #papercutart.
You’ll discover new ideas, techniques, and friends who understand your love for slicing paper for hours.
Final Thoughts
Advanced papercutting isn’t just a hobby. It’s an evolving skill. With each new project, you challenge your patience, precision, and imagination.
The beauty lies in the process as much as the final result. Whether you’re designing a wedding gift or prepping for an art show, these projects keep your creative spark alive.
Ready to Challenge Yourself?
If these ideas excited you, it’s time to pick a blade and start cutting. Have you tried any of these projects before? Or do you have your own favorite advanced papercutting challenge?
Tell me in the comments! Share your stories, photos, and tips. Let’s inspire each other.


