This post has already been read 3570 times!
Taper candles add charm and warmth to any space. They’re elegant, timeless, and surprisingly simple to make at home. Whether you’re into slow living or enjoy crafting by hand, making taper candles is deeply satisfying.
I stumbled into taper candle making during a cozy winter weekend. A friend gifted me a set, and their flickering light felt personal. That’s when I decided to try making them myself. After a few trials and wax-splattered mishaps, I found a process that’s both enjoyable and rewarding.
Let’s dive into how you can make taper candles on your own. No fancy studio needed. Just basic materials, a bit of patience, and some love for crafting.
Materials You’ll Need
Before you begin, gather your tools and ingredients. Here’s what you’ll need:
Candle wax (beeswax or paraffin works best)
Cotton wicks (pre-waxed helps beginners)
Wick sustainers or weights
A tall metal or glass container for dipping
Double boiler or melting pot
Thermometer
Optional: essential oils or candle dye
Protective gloves and newspaper to cover your workspace
These supplies are easy to find online or at a local craft store.
Choosing the Right Wax
The type of wax affects how your taper candles burn, look, and even smell.
Beeswax is natural, smells lovely, and burns clean. It’s my personal favorite. However, it can be expensive.
Paraffin wax is more affordable and holds scent and color well. It’s great if you’re experimenting with colors.
Soy wax is eco-friendly but soft. It’s better for container candles than tapers.
For a beginner, beeswax or paraffin offers the best balance of usability and quality.
Step-by-Step Process
Let’s walk through the candle making process. Don’t worry—it’s easier than you think.
1. Prepare Your Workspace
Cover the area with newspaper or an old towel. Melted wax is messy and sticks fast. Wear gloves to protect your hands.
Set up your dipping container. It should be tall enough to hold the full length of your taper candles.
Fill your double boiler with wax and start heating. Use the thermometer to keep the temperature between 160–180°F (70–82°C). That’s the sweet spot for dipping.
2. Cut and Anchor Your Wicks
Measure your wick length. Add extra inches so you can hold the wick while dipping. Tie a washer or wick weight to one end. This helps the wick hang straight when you dip it into the wax.
If you want to make two candles at once, tie two wicks to a stick or pencil and let them hang evenly on each side.
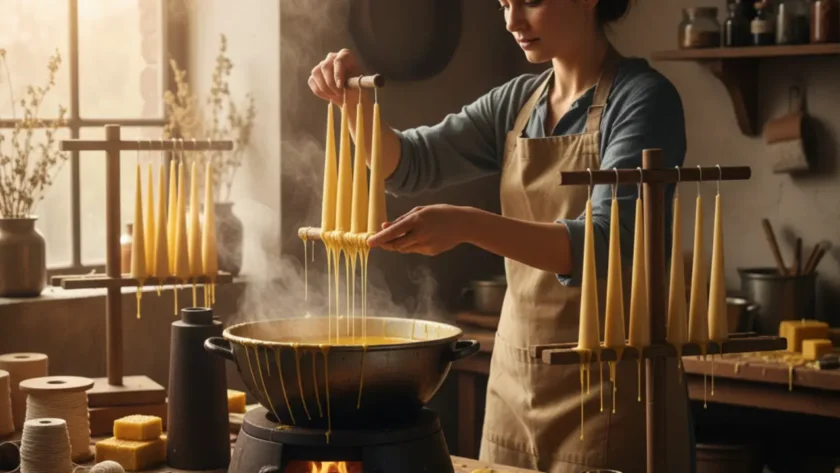
3. Start Dipping
Once the wax is fully melted, you’re ready to dip.
Hold the wick by the top and lower it straight into the wax. Leave it in for 5 seconds, then pull it out slowly and let it cool for 30–60 seconds.
Repeat the dipping and cooling process 15–20 times. The layers will build up, forming that familiar taper shape.
Hang the dipped candle or lay it flat to cool. Don’t worry if it looks uneven at first. You can trim and smooth it later.
Coloring and Scenting Your Candles
You can add candle dye chips to the melted wax if you want colored tapers. Just make sure the dye is wax-compatible.
For fragrance, add essential oils after removing the wax from heat. Use around 1 ounce per pound of wax for a noticeable but not overpowering scent.
Lavender, eucalyptus, and cinnamon are popular choices. Avoid using oils not meant for candle making—they can be toxic when burned.
Fixing Common Problems
Candle too thin? Dip a few more times until you get the thickness you want.
Candle too lumpy? Gently roll it on wax paper while it’s still warm.
Wick not centered? Tug it lightly before the wax hardens.
Everyone makes mistakes at first. My first batch looked like wonky crayons, but they still burned beautifully.
Let Candles Cure
Once you’re done dipping and shaping, hang your taper candles or lay them flat to cure for at least 24 hours. This helps them burn evenly and gives a smooth finish.
After curing, you can trim the wick to about ¼ inch.
Add Your Personal Touch
Wrap your taper candles in kraft paper or tie them with twine. They make thoughtful handmade gifts. Last Christmas, I gave a set of hand-dipped tapers to my sister. She used them for her holiday dinner, and now it’s a tradition.
You can also add little tags with burn instructions. Small details make a big difference when gifting handmade crafts.
Candle Safety Tips
- Never leave a burning candle unattended.
- Use a proper taper candle holder.
- Keep away from flammable items and pets.
- Always trim the wick before lighting.
Why Make Taper Candles?
Making taper candles isn’t just a hobby. It’s a mindful experience. You slow down. You create with intention. And the result lights up your space—literally.
Whether you’re crafting for yourself or gifting others, taper candles bring warmth to everyday life. They’re simple to make, yet deeply personal.
Final Thoughts
Taper candles may seem like old-fashioned decor, but making them brings timeless joy. Try it once, and you’ll likely find yourself hooked. It’s a great way to relax, unplug, and create something beautiful by hand.
If you’ve never tried it before, now’s the perfect time. Whether it’s a rainy afternoon or a peaceful weekend, light some music, melt the wax, and dip into the world of candle making.
Have you tried making taper candles before? Or do you have any tips to share from your own process? I’d love to hear your experiences. Drop a comment below and share your story. Let’s craft and glow together!


