This post has already been read 4259 times!
Ever thought about candle making but didn’t know where to begin? You’re not alone. Many people want to try candle making but feel overwhelmed by the materials and techniques. The good news? It’s simpler than it seems. With the right tools, a little guidance, and a bit of creativity, anyone can start crafting beautiful candles at home.
Whether you want to relax, gift handmade candles, or even sell them someday, this guide will get you started. Candle making is a rewarding craft that can easily become your favorite weekend hobby.
Why Candle Making is Worth Trying
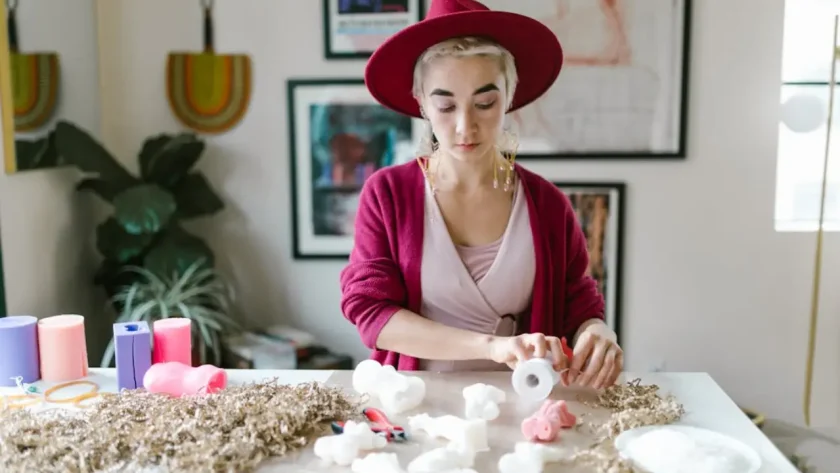
Candle making is more than just melting wax and adding scent. It’s an art form that lets you express yourself while making something useful. Each candle you make is unique—whether it’s the color, the scent, or the shape.
Take Lisa, for example. She was looking for a way to unwind after work. She picked up a basic candle kit, followed a few tutorials, and now she makes soy candles for her Etsy store. What began as a hobby turned into a small business that brings her joy (and extra income).
What You’ll Need to Get Started
Before you begin, gather the basic supplies. You don’t need to buy fancy equipment right away.
Here’s what you’ll need:
Wax: Soy wax is great for beginners. It’s clean-burning and easy to work with.
Wicks: Cotton wicks are the most beginner-friendly.
Containers or molds: Mason jars, tins, or silicone molds all work.
Fragrance oils: Choose scents you love. Lavender, vanilla, and citrus are popular.
Color blocks or liquid dye: These are optional but add personality to your candles.
Double boiler: You can use a heat-safe bowl over a pot of boiling water.
Thermometer: Helps ensure the wax reaches the right temperature.
Stirring stick or spoon
Glue dots or wick stickers
You can find these supplies at any craft store or online. A starter candle making kit is also a good option if you’re not sure what to buy.
Step-by-Step Guide to Candle Making
Let’s break down the process. You’ll be surprised how easy it is once you try.
Step 1:
Prepare Your Workstation: Lay down newspaper or a silicone mat. Candle making can get a bit messy.
Step 2:
Attach the Wick: Use glue dots or a wick sticker to fix the wick at the center of your container. Use a pencil or wick holder to keep it upright.
Step 3:
Melt the Wax: Use a double boiler to melt the wax slowly. Stir occasionally. Don’t rush this part. You want a smooth, even melt.
Step 4:
Add Fragrance and Color: Once the wax reaches about 180°F (82°C), add your fragrance oil and stir for a minute. Then add dye if desired.
Step 5:
Pour the Wax: Let the wax cool to around 140°F (60°C) before pouring. Pour slowly to avoid bubbles.
Step 6:
Let It Set: Allow the candle to cool and set for a few hours. Trim the wick to about ¼ inch before lighting.
Tips to Avoid Common Mistakes
Everyone makes mistakes at first. Here are a few you can skip by learning from others:
Don’t overdo the fragrance: Too much oil can affect how the candle burns.
Keep your wick centered: An off-center wick leads to uneven burning.
Watch the temperature: Adding fragrance at the wrong temperature can reduce scent throw.
Don’t pour too hot: This can cause cracking or sinkholes.
Candle Making for Gifting and Selling
Handmade candles make thoughtful gifts. Personalize them with custom labels, seasonal scents, or themed colors.
If you plan to sell, consistency is key. Keep notes on your fragrance-to-wax ratio, burn time, and customer feedback. Also, learn about labeling rules in your country. For example, you might need to list ingredients or safety warnings.
When Lisa started her Etsy shop, she used simple packaging and wrote thank-you notes with each order. Her customers loved the personal touch.
How to Get Creative with Candle Making
Once you’re comfortable with the basics, get experimental.
Try:
Layering colors for a striped effect
Embedding dried flowers (like lavender or rose petals)
Using silicone molds for shaped candles
Making massage candles with skin-safe oils
Creating themed candles for holidays or events
You can even make candles that match your home’s mood—like a cinnamon candle for fall or a coconut candle for summer.
How to Store and Use Homemade Candles
Store candles in a cool, dry place away from sunlight. This helps preserve the scent and color.
When burning your candles:
Trim the wick each time before lighting.
Let the wax pool reach the edge of the container on the first burn.
Don’t leave candles unattended or near anything flammable.
Why Candle Making is a Mindful Hobby
Candle making slows you down. It requires focus, patience, and a little bit of love. Whether you do it solo on a quiet afternoon or with friends during a craft night, it creates space to relax and create.
Many people find that candle making becomes a form of self-care. The warm light, soothing scent, and sense of accomplishment are hard to beat.
Final Thoughts
Candle making is a hands-on craft anyone can enjoy. It doesn’t need expensive supplies or advanced skills. Just start with the basics, follow the steps, and keep experimenting.
You never know—you might discover a lifelong hobby or even a business.
Have you tried making your own candles? Got any tips or questions? Drop them in the comments below. I’d love to hear your candle making stories!


