This post has already been read 4975 times!
Nothing beats the calm glow of a handmade candle on your table. The basics of candle making are surprisingly easy. You don’t need fancy gear or a craft studio to get started. Just a few supplies, a steady hand, and a bit of patience.
If you’ve been curious about how to pour, scent, and shape your own candles, you’re in the right place. This guide walks you through the entire process. From choosing the right wax to safely lighting your final creation, we’ve got you covered.
Let’s get right into it.
Why Candle Making Is a Great Hobby
Candle making offers more than a weekend craft. It calms your mind, sparks creativity, and even makes great gifts. Many people who try it once end up turning it into a full-time business or a weekend ritual.
Take Sara, a teacher from New York. She began making candles to unwind during summer breaks. Soon, her friends began asking for her lavender and eucalyptus blends. She now sells custom candles online part-time. That’s the magic of starting with just the basics of candle making.
Tools You’ll Need to Begin
Before you melt anything, gather the right tools. You don’t need much to start. Here’s a simple list:
- A double boiler or old pot
- Thermometer
- Wooden spoon or stir stick
- Heat-safe containers
- Candle wicks
- Wick holders (like chopsticks or pencils)
- Wax (soy, beeswax, or paraffin)
- Fragrance oils (optional)
- Candle dye (optional)
Stick to a basic setup at first. Once you’re comfortable, you can upgrade or experiment with molds, layered designs, or essential oil blends.
Choosing the Right Wax
Each type of wax gives a different result. Here are the most common types:
Soy wax: Eco-friendly, clean-burning, and holds fragrance well. Great for beginners.
Paraffin wax: Cheap and widely available. Offers strong scent throw but isn’t natural.
Beeswax: Natural and smells slightly sweet on its own. A bit harder to melt evenly.
If you’re just learning the basics of candle making, soy wax is a perfect place to start.
Picking the Perfect Wick
The wick matters more than most beginners think. A wick that’s too thin burns poorly. One that’s too thick may smoke.
Follow your wax supplier’s guide. Many will list wick sizes that match their wax. You can also test a few to see what works best for your container size.
Flat-braided cotton wicks are popular and work for most DIY candles.
Melting and Mixing the Wax
Always use a double boiler to melt wax. Never melt it directly on high heat.
Here’s a safe way to do it:
- Fill the bottom pot with water.
- Place wax in the top pot or a smaller bowl.
- Heat until it reaches 170–180°F (77–82°C).
- Remove from heat before adding color or fragrance.
- Add fragrance oils once the wax cools to about 160°F (71°C). Stir slowly for at least 30 seconds to blend well.
- Use about 1 ounce (28 grams) of fragrance per pound (450 grams) of wax. Too much can make the candle burn badly.
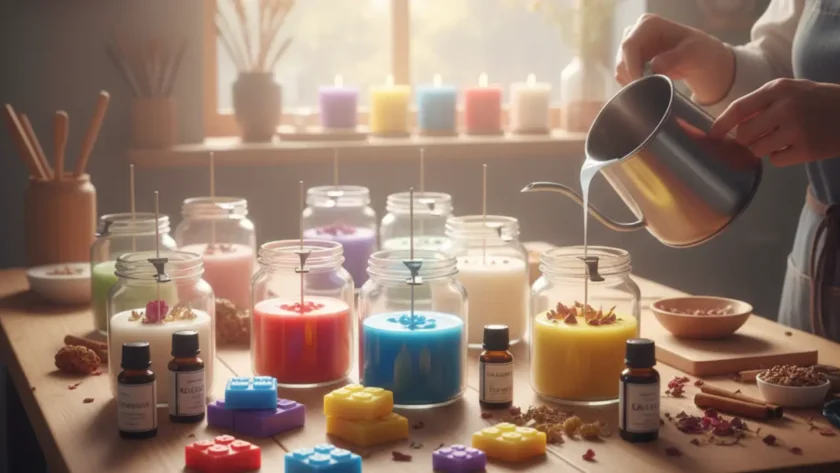
Pouring the Candle
Set your container on a flat, heatproof surface. Stick the wick to the center using a bit of melted wax or a wick sticker. Hold the wick upright using a chopstick, pencil, or wick holder.
Carefully pour the wax into the container. Leave about half an inch of space at the top. Let the candle sit undisturbed for several hours.
As it cools, a sinkhole may form around the wick. Just reheat some wax and top it off.
Curing and Trimming
Let your candles cure for 2–3 days at room temperature before lighting. This allows the fragrance to settle and the wax to harden fully.
Trim the wick to about 1/4 inch before lighting. A long wick leads to soot and uneven burning.
Never skip this step.
Common Mistakes Beginners Make
Starting with the basics of candle making helps avoid common issues. Here are some to watch for:
- Using too much fragrance oil
- Pouring wax too hot
- Choosing the wrong wick
- Ignoring wax temperature while adding scent
- Not securing the wick before pouring
Don’t let these trip you up. Each mistake is part of the learning process.
How to Add Your Own Touch
Once you’re confident with the basics, you can play around. Try:
Dried flowers
Essential oils
Decorative jars
Layered colors
Wooden wicks for crackling sounds
Make a batch of seasonal candles for holidays. Or mix your favorite scents to create a signature aroma. The possibilities are endless once you know the basics of candle making.
Safety Tips You Must Follow
Working with heat and fragrance oils means safety comes first. Always:
- Work in a ventilated space
- Keep flammable materials away
- Never leave melting wax unattended
- Wear gloves when handling dyes or oils
- Use a thermometer for accurate heating
Also, test each batch before giving or selling candles. It ensures quality and avoids accidents.
How to Turn It into a Business
If friends keep asking you to make candles, it might be time to go bigger. Here are the first steps:
- Brand your candles with a simple label
- Use social media to share your creations
- Offer custom blends or event candles
- Start small with local markets or online stores
Keep learning, testing, and refining. Many candle makers started just like you—with curiosity and a small kit.
Final Thoughts
Learning the basics of candle making is more than just a hobby. It’s a form of self-care, a creative escape, and even a way to earn money. Once you light your first homemade candle, you’ll understand why so many people fall in love with the process.
Whether you want to make gifts, relax on weekends, or build a side hustle, this craft can spark joy in your life. Try it once—and you might never stop.
Tried making your first candle? Have a favorite wax or scent combo? Share your candle story or ask a question in the comments!


