This post has already been read 22 times!
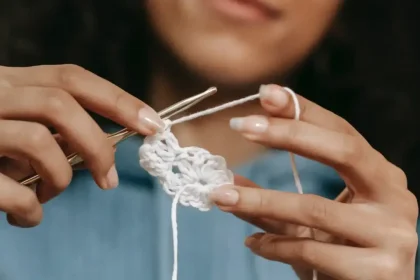
Sewing is a timeless craft, bringing together creativity and precision. Understanding various sewing stitches can transform your projects from ordinary to extraordinary. Each stitch has its own purpose and charm, contributing to the overall aesthetic and functionality of your sewing creations. Let’s dive into the fascinating world of sewing stitches and explore how they can elevate your crafting skills.
1. The Basic Running Stitch
The running stitch is one of the simplest and most essential sewing stitches. It’s perfect for beginners and serves as a foundation for more complex techniques. To perform a running stitch, pass the needle in and out of the fabric in a straight line. This stitch is ideal for basic seams and gathering fabric.
When making a simple pillowcase, a running stitch can secure the edges together efficiently.
2. The Backstitch
The backstitch delivers durability and strength. You commonly use it for seams that need extra reinforcement. To create a backstitch, start by making a small stitch forward, then insert the needle into the end of the previous stitch and pull it through. This technique ensures that the seam is both strong and neat.
Use the backstitch to sew the sides of a tote bag, where extra durability is needed.
3. The Whipstitch
The whipstitch, also called the overcast stitch, finishes raw edges and prevents fraying. You create this stitch by sewing around the fabric edge and catching it with each stitch. It’s particularly useful for hemming and securing linings.
When hemming a skirt, the whipstitch can neatly secure the hem while preventing it from unraveling.
4. The Blanket Stitch
The blanket stitch is decorative and functional. It’s commonly used to finish the edges of blankets and other fabric items. To create a blanket stitch, make a series of stitches that loop over the edge of the fabric. This stitch adds a decorative touch while also securing the edge.
Add a blanket stitch to the edges of a homemade quilt for a beautiful, finished look.
5. The Zigzag Stitch
The zigzag stitch offers great versatility and works well for many purposes. You often use it to stitch stretchy fabrics and finish raw edges. This stitch creates a zigzag pattern that stretches with the fabric, making it ideal for knits and stretchy materials.
When sewing a stretchy t-shirt, the zigzag stitch will allow the fabric to move and stretch without breaking the thread.
6. The French Knot
The French knot adds texture and visual interest to your projects. You create it by wrapping the thread around the needle, then pulling it through the fabric to form a small, textured knot. This sewing stitch is perfect for embroidery and adding small, detailed accents.
Use French knots to embellish a hand-embroidered flower on a handkerchief.
7. The Satin Stitch
The satin stitch is used to create smooth, shiny surfaces in embroidery. It involves making closely spaced straight stitches to cover a shape or letter completely. This stitch is ideal for adding decorative elements to fabrics.
Add a satin stitch to monogram initials on a pillowcase to give it a polished, elegant look.
8. The Chain Stitch
The chain stitch creates a series of interlocking loops that resemble a chain. It is commonly used in embroidery to create intricate and decorative patterns. To make a chain stitch, form a loop with the thread and then pass the needle through the loop, pulling it tight.
Use chain stitches to create a decorative border on a table runner or cloth.
9. The Lazy Daisy Stitch
The lazy daisy stitch is a simple embroidery stitch used to create petal shapes. It involves making a loop with the thread and then tacking it down with a small stitch. This stitch is perfect for adding floral designs to your projects.
Add lazy daisy stitches to a summer dress to give it a charming, floral touch.
10. The Herringbone Stitch
The herringbone stitch is a decorative stitch that creates a pattern resembling fish bones. It is often used for decorative purposes and to add texture to fabric. This stitch involves making diagonal stitches that cross each other.
Use the herringbone stitch to add a decorative touch to the edges of a hand-stitched wallet or pouch.
Exploring different types of sewing stitches opens up a world of creative possibilities. Whether you’re a beginner or an experienced sewer, mastering these stitches can enhance your sewing projects and bring your designs to life. Experiment with these stitches in your next project and see how they transform your creations.
Do you have a favorite sewing stitch or a project where you used one of these techniques? Share your experiences and tips in the comments below!